Showing posts with label Canning. Show all posts

Friday, June 23, 2017

Using Unripe Apples


One year  I made a mistake on when to harvest the apples.  I thought they were green apples and so I harvested them only to find out that, no, they are most likely Galas.  So  I had two huge five gallon buckets filled with green unripe apples!  I couldn't even consider just throwing them out, what a waste!   But searching around my books I did not find one recipe for unripe apples.  Then I started researching it on the internet and found that you can use them for apple jelly.  In fact unripe apples contain much more pectin (which aids in jelling) than ripe apples so this would be a good use for them.  I processed them just as you would regular apples by first making juice from them and then getting on with the jelly process.

My only change was that although the recipe said to just cut them up core and all into the pot to make the juice I cut out the core for a few reasons.  You should know that apple seeds contain natural cyanide that can poison a person if, say, you ate like forty apples including cores in one sitting. So with that in mind I did the following.  First these apples are much smaller than store bought due to being under-ripe so you would have many more core to apple ratio than in a standard recipe upping possible cyanide, also the seeds themselves would be less mature and soft so much more likely to leach the cyanide into the boiling juice, third much of the cores were infested with worms so I just cut them out.  By the way never feed whole apples to rabbits!  They eat the seeds and die from cyanide poisoning!  We had this happen once!


Everything worked fine and now I have 10 pints of apple jelly.  It tastes like it should and I will use it on toast or to glaze ham, chicken, or pork chops.

This would be a very good way to use up green apples that fall to the ground before their time.

Tuesday, July 7, 2015

Pickle Making and Home Fermentation Made Easy!

Canning day! I'm a history buff when it comes to how people actually lived and what they did to survive. When you look at the history of food preservation before canning jars came to be it was five things they did to prolong the foods life. This is not counting root cellaring.

"Of course I can!"Salting- which gave you good outcomes but made the meat very very salty. However since people back then ate very little meat the extra salt was probably appreciated.
Drying- no comment necessary

1950's housewife.....still using skill learned on the farm.....everyone was into canning food.Larding- things like mince pies or cooked meat was layered between melted fat and put in crocks in a very cold secure room. This was done in the late fall of course.

When we had so many chores, we didn't have time to worry about...all the crap we worry about now!Sugaring- preserve fruits in very high (like inedible) concentrations of sugar. The foods has to be soaked in water before eating. But this was only used infrequently because truly poor people had very little money to use sugar this way.

Fermented pickling- this was very common and used on meats, veggies and fruits.

Olde America Antiques | Quilt Blocks | National Parks | Bozeman Montana : Agriculture and Farming - Woman Canning 2I love fermenting my pickles and veggies. It doesn't require heat treating or self sealing lids. I have made both fermented pickles and regular pickles. I like fermented pickles for dills and mixed veggie pickles. They are always crisp tangy and have a zing that is almost like carbonation that other pickles don't. Also there is a lot of info out there pointing to lactos fermented pickles being very good for your health. I only do Bread and Butter cucumber pickles the standard way. The recipe I use for that is from my favorite book The Joy of Pickling.

Vintage canning graphic.  Mom canned a lot of the things we ate.Fermenting is also easy, much easier than making standard pickles. All you do is mix the brine, throw in the spices and veggies, cover with brine, and bam! Your done. The fermenting takes place in a moderately warm room or shelf. You check them ever so often to make sure the brine is covering the veggies and to make sure that the fermentation is doing it's thing. That's it! After two weeks you have really amazing food. Keep it in a cool place and they last up to a year like the fridge. Mine are gone way before that though! You can use used canning jar lids and quart jars for this. Or you can get old fashioned pickle crocks. You could also use non reactive tubs.

13 great posters on preserving food, when it was life or deathAnyone here who has put up lots of food for home use will know that the summer is frenetic in its pace. You are constantly planting, harvesting, canning, and preserving all the food to get you through to the next year from dawn till dusk. So anything that cuts down on processing time is a blessing, especially if you are using a wood cook stove to process jars in a hot kitchen .

Just to give you a clue on how much food you'll need to be canning for fall/winter/spring use I tell you mine. I have a family of 6. To get us through from fall to late spring I have to can:

Some Basics of Home Canning (recipes and how to use home canned items also)30 quarts applesauce
30 quarts cherries
30 quarts pears
30 quarts peaches
20 quarts assorted pickles
20 pints of assorted fruit pickles
15 pints each of strawberry, cherry, peach, and apricot jams at least
45 quarts marinara sauce
30 quarts tomatoes
30 pints of misc. condiments like apple chutney, salsa, and ketchup.

vintage housewifeI don't can green beans because it freaks me out with the low acid so I freeze tons and tons of them for dinners.

I also freeze a mix of summer squash/onion/eggplant for casseroles, soups, stir fry, and oven roasting in the winter.

There is so much more I do or want to do but these are just the main things I shoot for. We also root cellar a lot of winter squash, potatoes, apples, and onions. You can see how busy you'll be just doing preservation if you really had to grow all your own food. And I don't even reach that goal. I'm going to try doing sauerkraut this year too. It's supposed to be much better than the store stuff and you can ferment it in quart jars.

Two great books on easy fermenting foods are:


The Joy of Pickling- has a huge section on fermented pickles. The other sections are great too, I tried making pickled grapes last year with a recipe from this book and even my very picky extended family loved them at Thanksgiving. They were more like a condiment you would serve with meat. Like cranberry sauce.

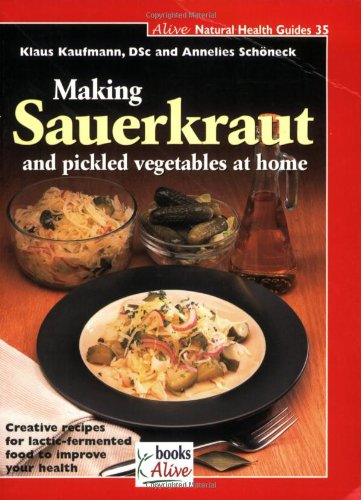
Making Sauerkraut and Pickled Vegetables At Home- Klaus Kaufmann and Annelies Schoneck- This is where I first learned to make fermented pickles. It explains how Lactic acid fermentation works to preserve the food safely and a step by step look at the process which The Joy of Pickling does not. The Joy of Pickling has many more recipes for flavors of fermented pickles. They sell this book in health food stores.


Tuesday, May 10, 2011

Calling All Home Canners... We Ride!

It has officially begun!  Canning season is here at last!  Now begins the exciting time when I begin canning and preserving the foods that will last us from this spring to next spring.  My canning goals are very extensive this year to not only include all our fruit, jams, jellies, pickles, and condiments.  But this year I am also pushing to can all our vegetables, soups, and salsas.

My first endeavor of the year?

Strawberry Rhubarb Jam


I have actually never have had rhubarb before last year when we moved here.  Our rhubarb plant is amazing and huge.  People comment on it all the time.  So this year I have made a resolution to not only can up lots of rhubarb strawberry jam, but also just plain rhubarb in a heavy syrup for baking with all year long.  We have several recipes that we have tried that are very good.

The jam was amazing, but really you can't taste the rhubarb.  It just tastes like strawberry jam to me. The recipe comes from my ever trusty Ball Blue Book of Canning.

Monday, October 25, 2010

Canning Applesauce

 
I know the end of the canning year has arrived when I make the applesauce.  This is my last big effort of canning before I retire the kettles and jars until spring and start getting ready for the holidays.  The apples I used this year were Golden Delicious and Rome's.  I generally use a half and half mix of Golden's and Red Delicious but this year could only get the Rome's at a great price.  I paid 25 cents a pound for over 150 lbs of apples.  Half of these were Galas for winter storage in our cold room for fresh eating. Believe it or not you do not have to add sugar to most canned fruits to preserve them.  They already have enough natural sugar, but they will be insipid and tasteless without the sugar.  This is why you are better off making applesauce with sweet eating apples like Golden's or red Delicious.  you can then use very little sugar saving tons of money and making the sauce healthier.  Using a mix of two or more apples will also give the sauce a better flavor.


Golden Delicious Apples

 You can see why I am so impatient for my apple trees to start producing and why I planted them in the first place.  If I had an unlimited free supply of apples I would also dry them, can apple pie filling, apple butter, and make apple pies/tarts/bread/fried apples all the time!  And maybe just for fun make cider.  I can expect plenty of fruit from my five trees, but deep down I long for more.

I have now pretty much got canning down to a system.  Each fruit or veggie requires a little bit different processing method so to really get into a rhythm you have to adapt to each food item.  My applesauce system is as follows.

First I put all my jars into the dishwasher with two tablespoons of bleach thrown in for extra sterilizing power and start it.  As long as the jars stay hot after washing they are considered sterile.  Then I fill my big water bath canning kettles and start them heating because they take awhile to get to boiling.

Next I start peeling the apples.  After I get one extra-large full bowl I pour the apples into my big stock pot with two cups water and boil till tender.  Then they go into the blender.  This gives them an extra smooth texture unlike anything you have tried in the store.  Back into the stockpot the sauce goes with one cup organic cane sugar and Cinnamon and nutmeg. Once it boils the sauce is ladled into quart jars, sealed, and then immersed in the now boiling water canner for 20 minutes.  Now the system starts in earnest.


While one batch is in the water bath I am cooking another batch which takes about 15 minutes to reach tender.  While all that is boiling I am peeling more apples.  In that 20 minutes I am able to fill my big bowl for another batch.  On it goes until I'm done!


This morning I canned 27 quarts of applesauce